
It has been quite awhile since I've posted, so I've come with cupcakes, because who can be upset when I'm offering a vivid red velvet cupcake and milk?
No, it's not my birthday (but thanks for asking!). Yes, it is three of my dear friends birthdays today, but, no, I didn't make these cupcakes for them (they live in the other three corners of the States - California, Florida, and Massachusetts). I suppose I could mail them, but I don't think they'd be much good when they arrived. And all the more, I'm stuck at home with a silly broken ankle. (Yes, i'm fine and no, my cast is not red... had I been planning ahead I could have coordinated). Well, now that i've told you (in a roundabout manner), why it is I have a dozen cupcakes and a bottle of milk (oh yes, and two bottles of Veuve Cliquot), I'll explain in full. You see, I'm stuck at home, with not much to do (besides work, reading, knitting, researching for an upcoming trip to India, catching up on DVDs, and tearing apart some electronics). I was supposed to meet some friends for happy hour tonight - to celebrate one girl getting married (actually, it turns out she didn't quite get married yet - something about Puerto Rico asking for a stamp on the back of her passport) and another's birthday. Instead of hobbling out to the bar, my friends decided to come to me. So I made these cupcakes to have as we open a bottle of champagne in celebration tonight.

Now that I've bored you with the details behind these cupcakes, I'd do best to share with you some photos. I tried a new recipe (actually, come to think of it, I've never made red velvet cake before.. my amazing mother has always made it for me and I've simply eaten it). I have eaten more than my fair share of it, so I do consider myself somewhat of a red velvet expert.
You see, in my family, we have recently started a debate around what type of frosting belongs on red velvet. What I grew up with was what I was always used to (and what my brother prefers). However, at some point (I hear you asking "when?" and I regret to inform you that, if you can believe it, I don't remember when such a crucial turning point was!), I tasted red velvet cake with cream cheese frosting. And I was a changed person. Now nothing can compare with the delicious red velvet cake that my mom always made growing up. But that cream cheese frosting, DANG! So when I set off in search of the perfect recipe, I knew I had to find one with cream cheese frosting. I settled on a recipe from the blog "Pinch My Salt". I've copied the recipe at the bottom, but she has some lovely photos, so I'd recommend checking out her site as well.

What I liked about this particular recipe (aside from the fact that the I had all the ingredients!) was the way the food coloring was added. It was mixed with the cocoa powder to form a paste (now I only had a 0.3 fl oz bottle of red food coloring, so I added water to get the appropriate consistency). I found that this was significantly less messy than I had originally suspected and provided more than enough of the red color.
I also had an impromptu history lesson. Apparently the red velvet cake was the signature cake at the Waldorf Astoria in the 1920s, and, as such, is referred to as the "Waldorf Astoria Cake." In addition (according to Wikipedia, I warn you), when foods were rationed during WWII, people used beets to get the red color of the cake. So it can be healthy too! That, my friend, would be a welcome addition to any "Beet Party" you may go to.
With that, I will leave you, to hop on off (or, in your case, you may be able to just walk) to the kitchen and make some of these delicious darlings for yourself. Just make sure you change out of any white you may be wearing!

Red Velvet Cake (a.k.a. Waldorf Astoria Cake) --- (Recipe from Pinch My Salt)

2 1/2 cups sifted cake flour*
1 teaspoon baking powder
1 teaspoon salt
2 Tablespoons cocoa powder (unsweetened)
2 oz. red food coloring
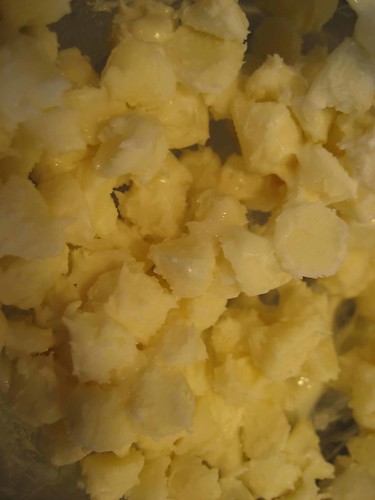
1/2 cup unsalted butter, at room temperature
1 1/2 cups sugar
2 eggs, at room temperature
1 teaspoon vanilla extract
1 cup buttermilk, at room temperature
1 teaspoon white vinegar
1 teaspoon baking soda
1 teaspoon baking powder
1 teaspoon salt
2 Tablespoons cocoa powder (unsweetened)
2 oz. red food coloring
1/2 cup unsalted butter, at room temperature
1 1/2 cups sugar
2 eggs, at room temperature
1 teaspoon vanilla extract
1 cup buttermilk, at room temperature
1 teaspoon white vinegar
1 teaspoon baking soda
1. Preheat oven to 350 degrees. Butter and flour two 9-inch round cake pans or three 8-inch round cake pans.
2. Sift together the cake flour, baking powder, and salt into a medium bowl; set aside. In a small bowl, mix food coloring and cocoa powder to form a thin paste without lumps; set aside.
3. In a large bowl, using a hand mixer or stand mixer, beat butter and sugar together until light and fluffy, about three minutes. Beat in eggs, one at a time, then beat in vanilla and the red cocoa paste, scraping down the bowl with a spatula as you go. Add one third of the flour mixture to the butter mixture, beat well, then beat in half of the buttermilk. Beat in another third of flour mixture, then second half of buttermilk. End with the last third of the flour mixture, beat until well combined, making sure to scrape down the bowl with a spatula.
4. Make sure you have cake pans buttered, floured, and nearby. In a small bowl, mix vinegar and baking soda. Yes, it will fizz! Add it to the cake batter and stir well to combine. Working quickly, divide batter evenly between the cake pans and place them in a preheated 350 degree oven. Bake for 25-30 minutes. Check early, cake is done when a toothpick inserted in the center comes out clean.
5. Cool the cakes in their pans on a wire rack for 10 minutes. To remove the cakes from the pan, place a wire rack on top of the cake pan and invert, then gently lift the pan. Allow cakes to cool completely before frosting. Frost with buttercream or cream cheese icing (recipe below).
Recipe Notes: *Sift cake flour once before measuring, then sift again with the other dry ingredients per recipe instructions. Wear an apron and be careful with the red food coloring–no matter how hard I try, I always end up staining something! As you’re mixing the cake batter, use a spatula to scrape down the bowl frequently throughout the entire process.
Cream Cheese Frosting
16 oz. cream cheese (2 packages), softened
1/2 cup unsalted butter (one stick), softened
1 teaspoon vanilla extract
2 1/2 cups powdered sugar, sifted
pinch of salt
1/2 cup unsalted butter (one stick), softened
1 teaspoon vanilla extract
2 1/2 cups powdered sugar, sifted
pinch of salt
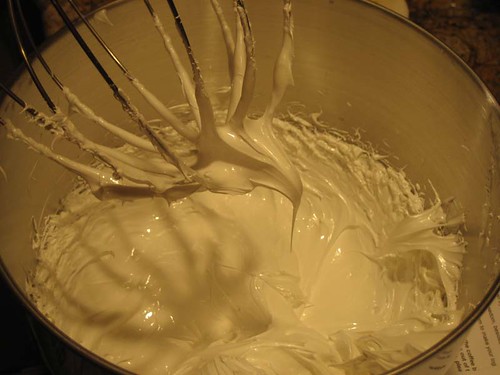
With an electric mixer, blend together cream cheese and butter until smooth. Turn mixer to low speed and blend in powdered sugar, salt and vanilla extract. Turn mixer on high and beat until light and fluffy. Use immediately or refrigerate, covered, until ready to use. If refrigerated, the frosting will need to be brought to room temperature before using (after frosting softens up, beat with mixer until smooth).
Recipe Notes: If you prefer a sweeter and/or stiffer frosting, more powdered sugar can be added (up to four cups). But remember, the more sugar you add, the less you’ll be able to taste the tangy cream cheese!


